(Edited by Devon LaChance)
Coming soon to a Hobby Shop near you!
New Products

ATHEARN has just announced EMD SD60’s in both CP and CN paint, and in three different numbers!


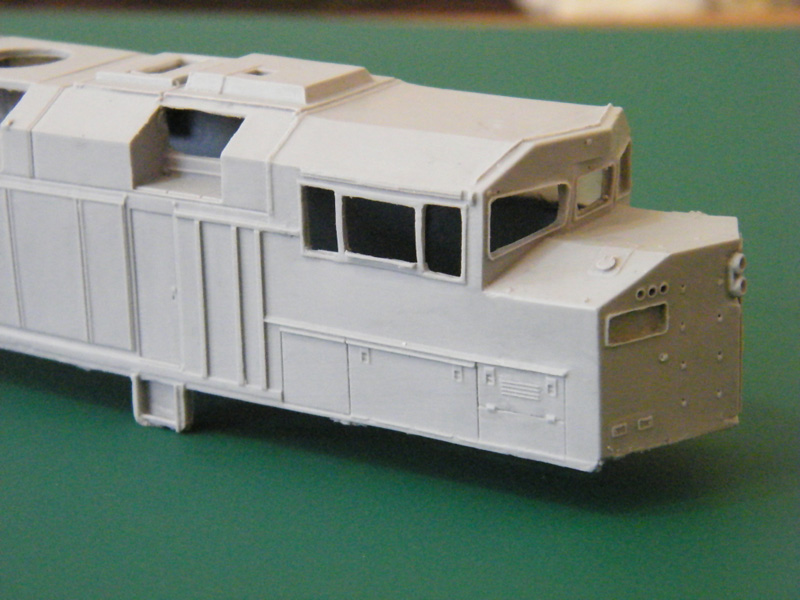
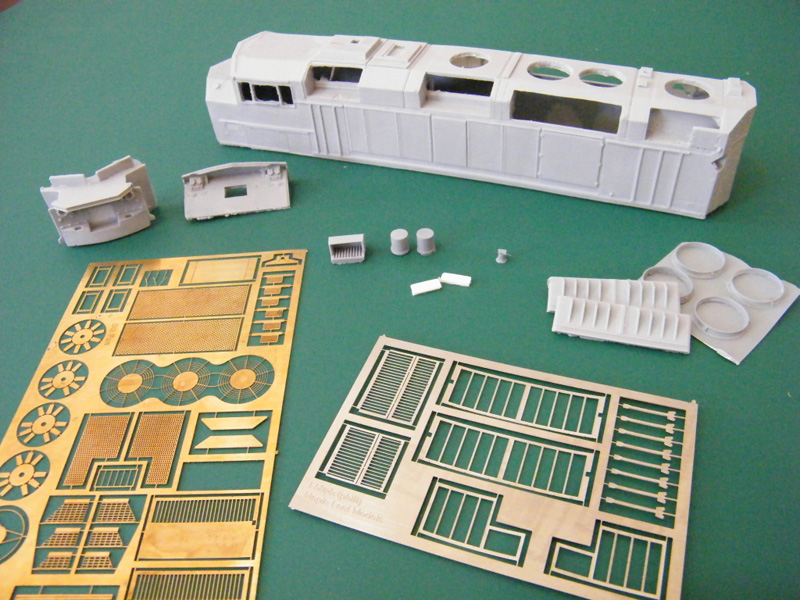
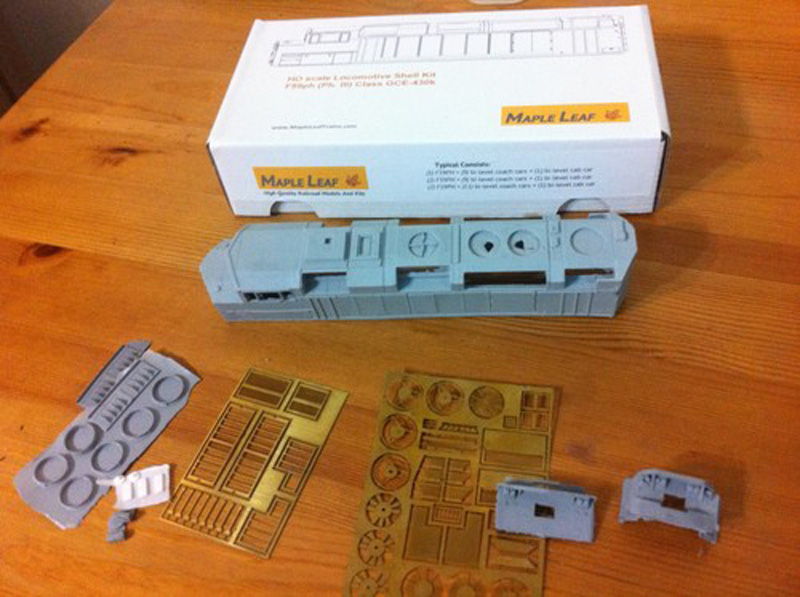
Maple Leaf Trains has just released their first HO locomotive model shell. The GMD-built F59PH (phase III) version, now available for the first time in HO scale. The first run is decorated in GO transit white and green. CRO will be reviewing the model over the next two months.
http://www.mapleleaftrains.com/

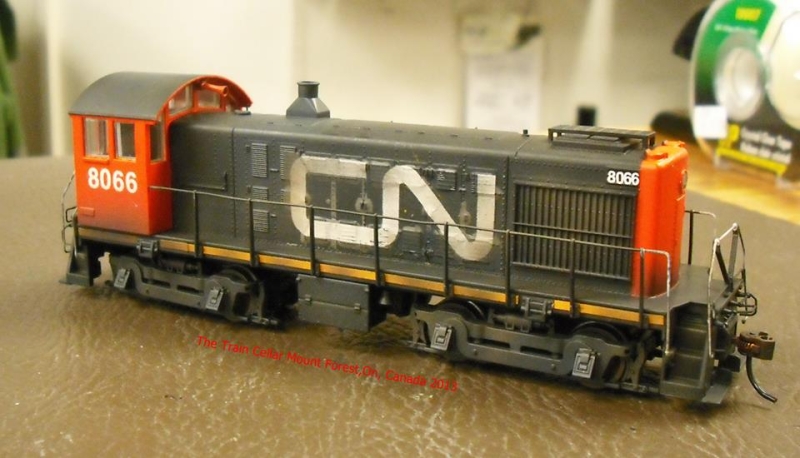
HO "Yard Limit Models" like CN 8055 shown, are custom painted Bachmann S-4 switchers with DCC/Sound, and available at The TrainCellar for $149.95 each
The TrainCellar paint department has several custom locomotive projects with work in progress. This HO scale CN SD60 5476 looks terrific in its former Oakway Leasing paint scheme, with CN patches and weathering.

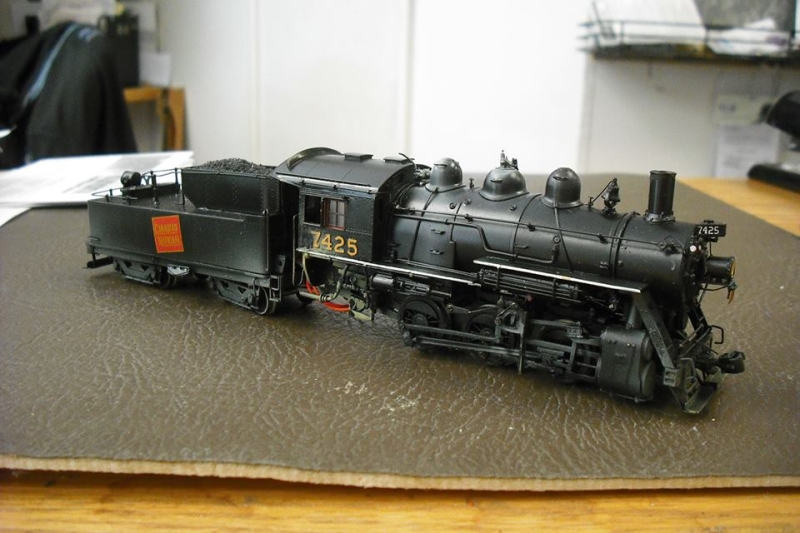
An HO Scale Van hobbies Brass CNR 0-6-0 SoundTraxx Tsunami system installed for a customer.


NS/UP SD70M Flared Radiator conversion
By Sandra and Peter Merseberg
Sandra and Peter created several forms for their the new " SD70M flared radiator", and provided these pictures of their first prototype for Norfolk Southern SD70M #2592 This conversion kit allows for different versions of the flared radiator the SD70M models owned by Norfolk Southern and Union Pacific.
SD70M flared radiator product list:
SD70M from Athearn Genesis
The conversion kit and detail parts are self- made products
NS Decals are available from Shell Scale Decals
Paint – NS Black self mixed
Digitrax DCC 164ph
Detail parts are from the Athearn SD70M
Feel free to contact us through CRO editor@williammhbaird.com


Illinois Central Gulf Vert-A-Pac car carrier
(By Doug Sword)
This is the ICG Vert-A-Pac auto carrier a very nice model that just required new couplers, trainline air hoses, and some uncoupling levers before weathering it up. My layout is themed in the mid-lates 1970's Southern Ontario so I doubt this car would have been seen here. Still, I couldn't resist such a neat car for only 20 dollars!
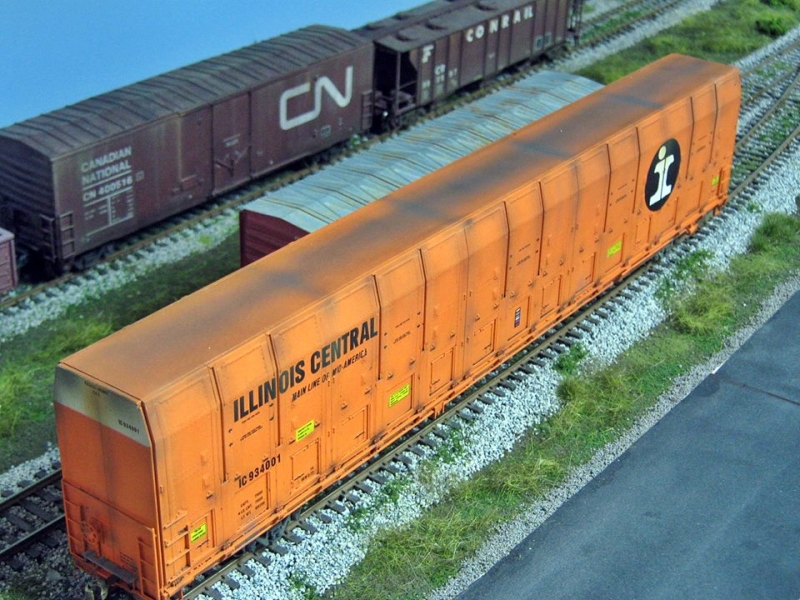
When autoracks as we know them, on 85 or 89 ft flatcars came into general service, they could pack eighteen cars onto a normal tri-level autorack. While that is a lot of vehicles, it still doesn’t come close to the maximum laden weight for the car. When Chevrolet introduced the Vega in 1970, they were intent on keeping the cost of the vehicle as low as possible and endeavoured to find as many ways to do this as they could. One of the ways was to cut down the cost of transportation of new Vegas to their respective dealers. If more Vegas could be packed onto an autorack, substantial savings could be made. Southern Pacific and GM came up with the Vert-A-Pac as a solution. The Vegas were driven onto side ramps and fastened down securely. They were then tipped up and the ramps locked so they were carried standing up, hood down thus going from eighteen cars to thirty being shipped. While the Vega proved a good seller when it was introduced, they didn’t last out the decade and when sales finally dried up, the Vert-A-Pacs were of no use anymore and scrapped. The flatcars they rode on were subsequently reassigned to other duties.
THE MODEL
ExactRail has certainly given us some very nice cars these past few years and the Vert-A-Pac was certainly one of their more ambitious efforts! When they announced they were not going to be using dealers anymore but going direct order, my local Train Shop had a huge sale on all of their ExactRail stock. I headed straight for the Vert-A-Pacs with the sole intention of getting an Illinois Central Gulf one, which I did for Eighteen dollars! As usual with the ExactRail cars, it is very well done. While a photo of a prototype ICG Vert-A-Pac has eluded me so far, I did know that Illinois Central was only one of three roads that had painted the flatcars and marked them in home road colours (Southern Pacific and Southern being the other two). After taking the car out of the box, I figured I’d just do a few little things to get her into shape before weathering.

I started by removing the visible mold seams from some areas it stuck out like here on the brake cylinder. I used Modelflex Illinois Central Gulf orange to touch up the spots afterwards. I always find this worth doing if needed because the more you weather the car, especially if you are using an airbrush, the seam becomes more and more noticeable. You could also paint the cylinder a different colour at this point too and make it look like a newer replacement part for some additional interest.

I decided to replace the kit couplers with a set of long shank Kadee 158 scale head couplers. You can see on the SP prototype on the right, that the coupler does stick out a bit further than the supplied one does. One other bonus here is that this car is already good on tight radius curves and when you add the long shank coupler, it gets even better. This car will negotiate the one 18” curve I have on my layout with no problems at all.

I added a pair of Detail Associates uncoupling levers next. While not quite attached to the coupler the same as the prototype, they do add to the look of the car and compliment the other nice standoff details like the crossover platform and ladders.

The only other detail I added was some details West train line air hoses. One thing you should do here is to file a small groove into the carbody to the right of the coupler so the airhose will sit at the right height and not foul any turnouts or crossings. Normally at this point, I would detail out the brake gear underneath the car if, like this one, it is not included. On this car however, there are two very large beams running opposite one another down the length of the car and the brake gear is mostly contained between them. ExactRail has very accurately included all visible brake gear and its piping.
PAINTING AND WEATHERING
I must admit, I usually try to buy my rolling stock undecorated and paint it myself. Mostly because I enjoy building and painting a car from the ground up but also I find that many cars have really nice, crisp molding details that get somewhat obscured by heavy factory painting. I am currently working on two 86ft auto parts boxcars which are the older Athearn ones from the 1970’s and once I stripped the factory applied Union Pacific and Chesapeake and Ohio livery on both cars, I was very impressed with the nice sharp molding on them. With this car, as with other newer cars on the market now, the paint is really nice so it was just some weathering needed.

I started by sealing the car with an overall spray of Model Master semi-gloss clear. Once it had dried, I gave the car an overall dirty black wash to deepen the crevices and bring out the detail more. I started the weathering from the top down by spraying black along the top to simulate sooty diesel exhaust staining. For this, I use Tamiya XF 69 NATO black. This is a nice sooty grey/black that dries back very flat and looks just right for exhaust soot. I then used the airbrush again while I had the NATO black in and sprayed down the sides of the car between where the doors would open and along the corners and top middle of the carbody. I switched the black now from NATO black, to Polly S engine black and focused the pattern down as fine as I could and sprayed each door hinge. I would imagine that these were regularly greased and would have probably shown up quite prominently against the bright ICG orange of the car.

I washed up the airbrush and then replaced the engine black with Model Master dark skintone. This colour is a nice greyish/brown that I like to use for road grime on the underbody of my cars. I thin it right down and give the underbody a nice heavy coat and bring it up the lower sills of the car going a little heavier near the trucks. The trucks themselves I paint with the Tamiya NATO black. Before I followed up with the dark skintone overspray, I hand painted the bearing adapters red as some occasionally are for a bit of interest. Once the dark skintone oversprays them, it tones them down a bit.

So now for a bit of before and after. I didn’t lighten the base ICG orange up as I would have normally done with a light spray of Model Master gull grey but with the weathering process seems to have toned the colour down just nicely. I know it does seem a bit of a pain to change three very similar colours while working on the car but the subtle change from the sooty NATO black, to the greasy looking engine black, down to the dark skintone road grime do stand out from one another once airbrushed onto the car and are well worth the effort.
At the end of the day, I didn’t beat up on this car too much. Illinois Central only had seven cars numbered 934000-934006. The build date on this model is May of 1972 and with Chevy Vega production ending in 1977, this car would have had, at best, five years on the rails before the Vert-A-Pac carbody was removed from the flatcar it rode on and scrapped out so I tried to temper the weathering to match that. I think the car would have had to see a bit more action before any rusting issues would have begun to show. Overall, a very nice model of a very impressive car. Thumbs up to ExactRail for tackling such an interesting subject. That is a lot of research, tooling, and time to produce a car that really only has a narrow window of operation in terms of layout timeframes. While my own layout does fit the timeframe, the location doesn’t. My layout is set in the mid-late 1970’s In Southern Ontario where no Vegas were produced. They were, however, produced in Sainte-Therese Quebec. It would be interesting to know if this car would have made it there!
Train Clubs
QUEBEC:
West Island Modular Railroad Club
The Vermont and Essex Model Railway Club (Montreal, QC)
Sorel – Tracy Model Railroad Club (No Website)
© CRO October 2013

