(Edited by Devon LaChance)
Coming soon to a Hobby Shop near you!
ATHEARN has just announced EMD SD60’s in both CP and CN paint, and in three different numbers!
http://www.athearn.com/Products/Default.aspx?ProdID=ATH97905
http://www.athearn.com/Products/Default.aspx?ProdID=ATH97902

New Products

http://www.mapleleaftrains.com
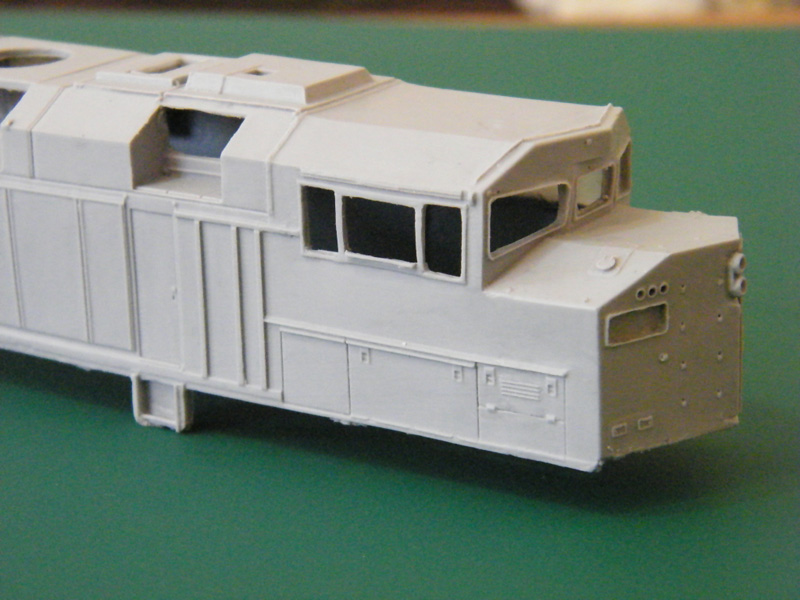
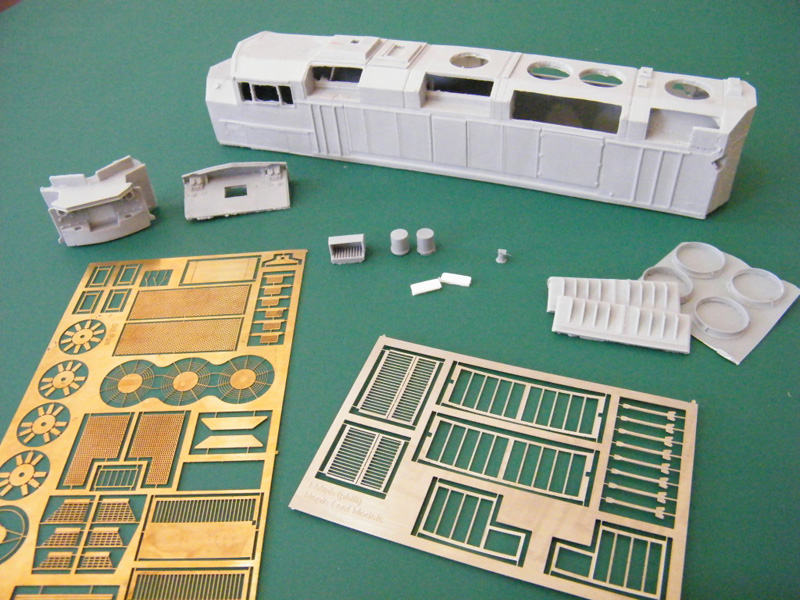
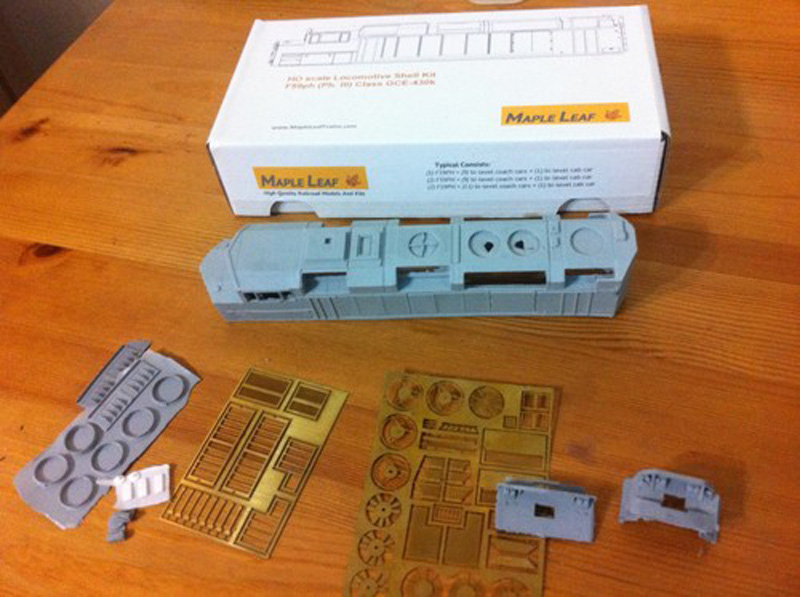
Maple Leaf Trains has just released their first HO locomotive model shell. The GMD-built F59PH (phase III) version, now available for the first time in HO scale. The first run is decorated in GO transit white and green. CRO will be reviewing the model over the next two months.
http://www.mapleleaftrains.com/
New Releases:
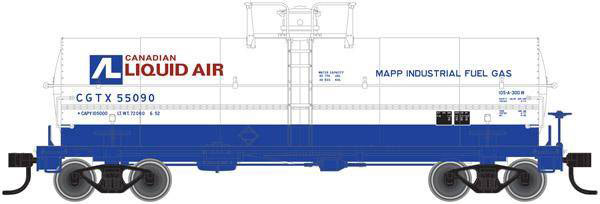
Just announced by Atlas in N, HO and O scale 2 and 3 rail. Canadian Liquid Air 11kg tank cars. Due mid 2014.
Underbody shot of the pre-production Rapido Trains HO FPA4 and FPB4 locomotives. 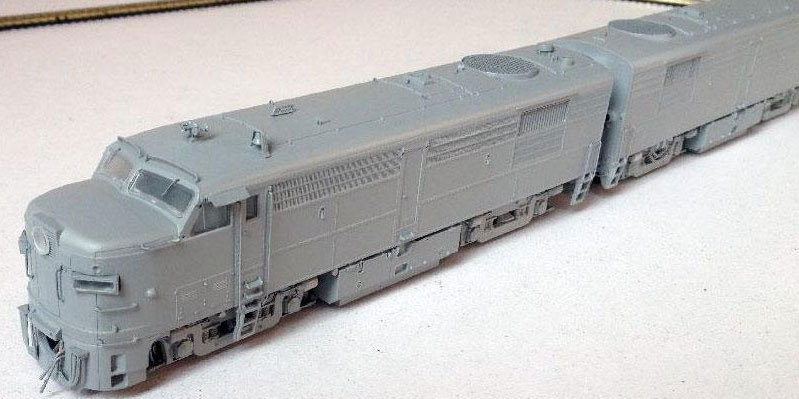
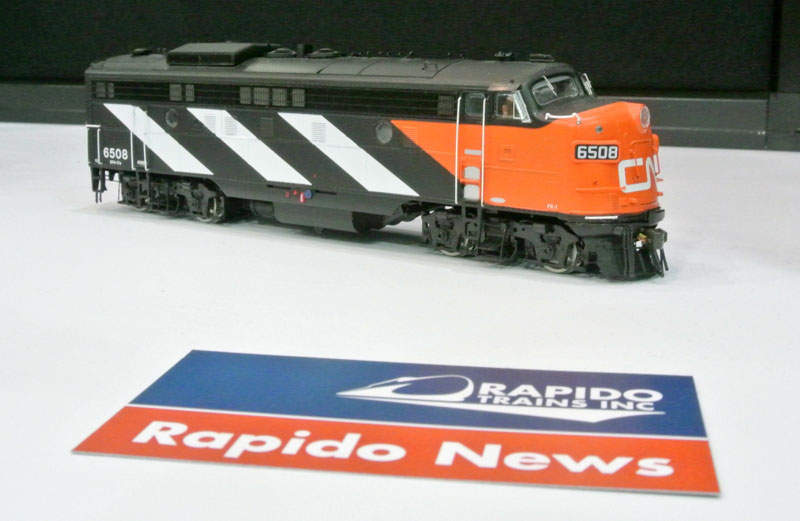
Rapido Trains has released their FP9Au in CN paint.
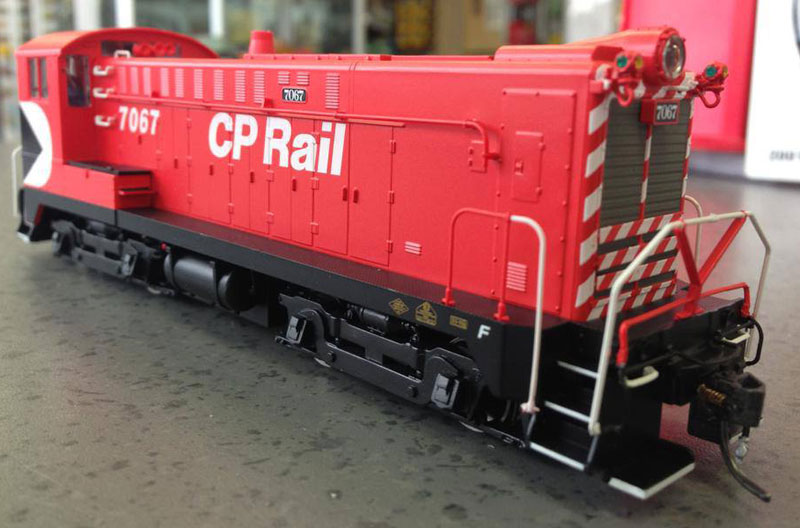
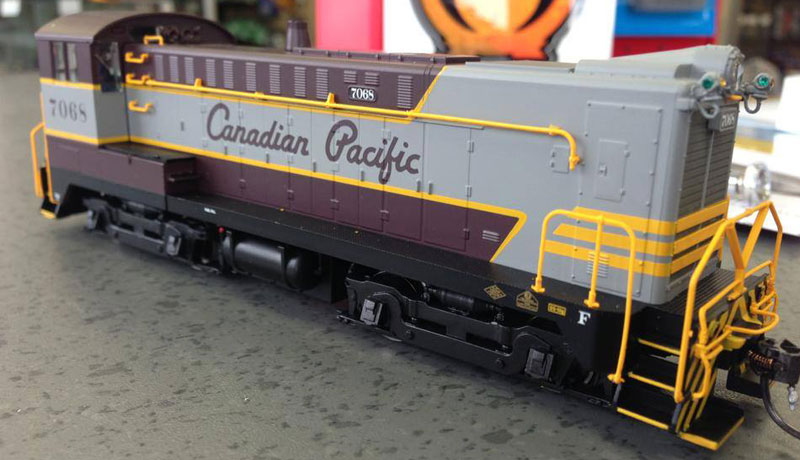
The new Bowser HO Canadian Pacific DS4-4-1000 locomotives arrived last week. These units are $169.98 for the analog version or 279.98 for the version with DCC and sound from Loksound. TWO PHOTOS CP Moaroon and the CP RAIL Red
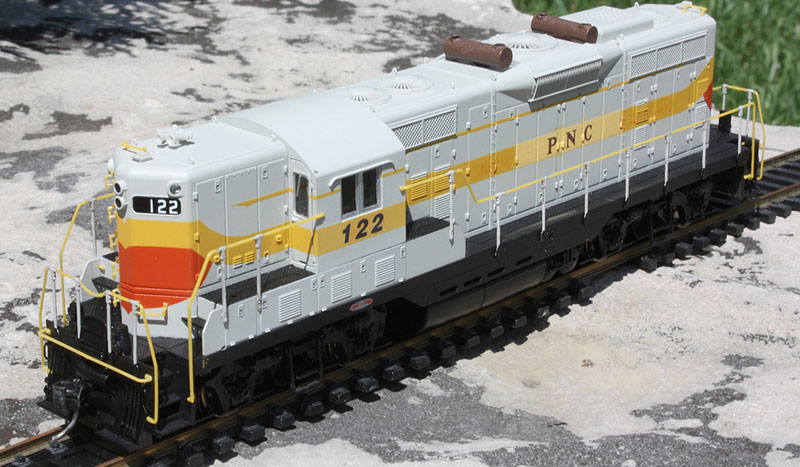
Dan Dell’Unto’s Precision National Corp GP9
These were leased to Canadian Pacific in the 1960’s and 1970’s, and were often seen in the Montral and Toronto yards. Here's one I've had done for a while, I was just waiting on some extra parts to install before posting: a Precision National GP7 leaser unit, one of the bunch that was leased to CP in the early-mid 1970's.
It started out as a stock Proto 2000 GP7 model painted for Quebec, North Shore & Labrador. I carefully removed all the numbers and lettering from the hood and cab sides (leaving the factory painted shell intact). I then patched the hood yellow where CP painted over the old Bellequip leasing lettering, and decalled new PNC lettering in its place. CP restencelled all the units when PNC got them from Bellequip, and each either got "PNC" on the long hood in CP style block lettering or the newer CP Rail font (most of the units got the CP Rail font cab numbers early on). I borrowed letters from a few Microscale decal sets to letter the hood sides, cab numbers, and numberboards, and sealed everything with clear once it was done.
Other modifications include more accurate sideframes and a speed recorder, a modified horn (M3 types on most, others had K5HL horns), patched solid side skirts, painted handrails and stanchions, and some CN-style spark arrestors on the roof. As I wanted to keep most of the factory paint, I didn't cut holes into the long hood to install the extra vents that QNSL did when they rebuilt their GP7's, and also left the footboards as the early style some units had.
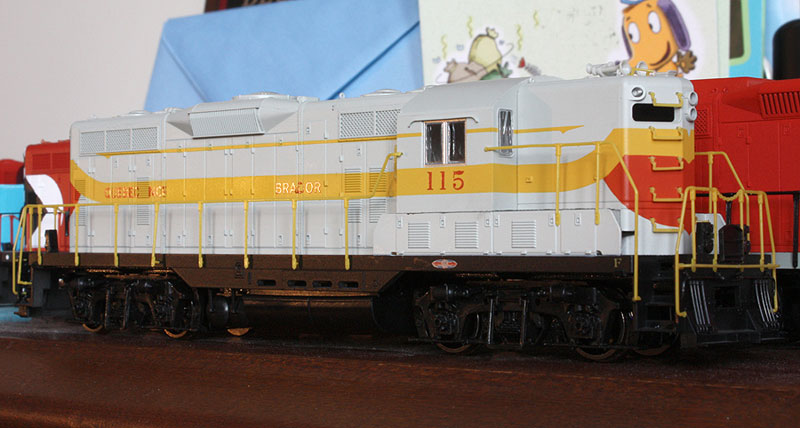
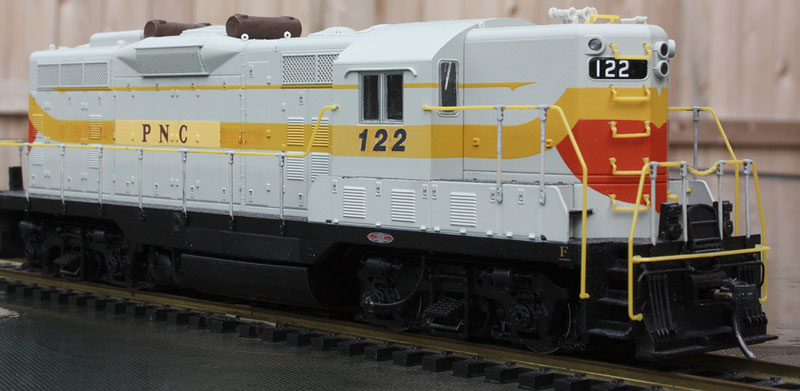
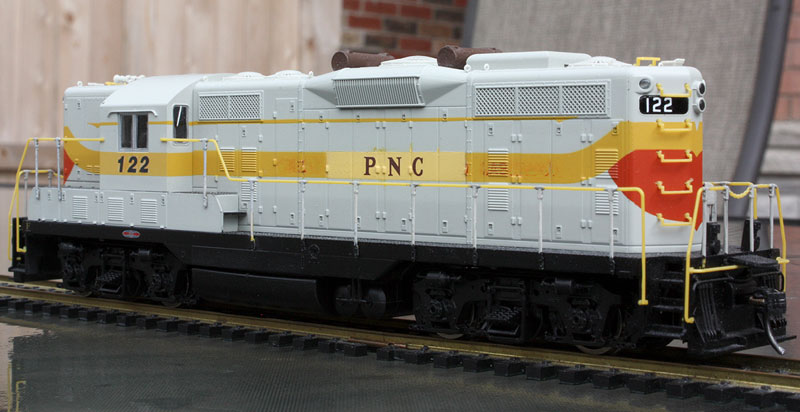
-Dan Dell’unto-
Modelling a PENN CENTRAL PS1 50-Foot
(By Doug Sword)
PENN CENTRAL PS1 50FT BOXCAR
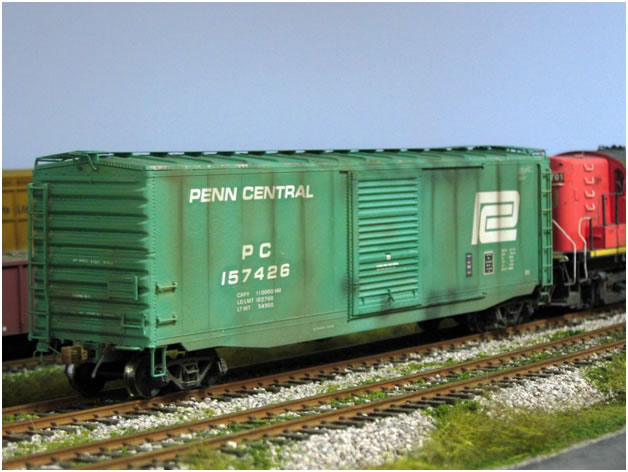
I must admit, although many railfans I have talked to think of the 1970’s a sort of “lost decade” for railroads, they were definitely my favourite times as a kid with the CN Halton Sub only a minute’s bike ride from my house and both the CN and CP Rail Brampton stations close as well. Every Wednesday, we could also watch the CN crews on the Dennison Ave. spur switching boxcars at the Dixie Cup plant and Royce Industries. One day in particular I can remember watching an SW 1200 shove a Penn Central boxcar along the track with a Brakeman up on the high mounted brake wheel and as the car rolled into its spot, seeing him spin the brake wheel until it slowly rolled and stopped exactly where it was supposed to be spotted. Now to a twelve year old in 1976, that was about the coolest thing I had ever seen. Every train you saw was so different from the next as well. Large MLW Centuries pulling trains made up of older cars as well as newer ones from the many roads that were around then cashing in on the IPD boxcar boom made for some pretty colourful, interesting trains. So when I re-entered the fine world of model railroading after a long hiatus, my era of choice was a foregone conclusion! After picking up a couple of 40ft and 50ft Pullman Standard boxcars, I decided to make a Penn Central 50 footer my first project.
THE MODEL
I started with the undecorated InterMountain 50ft Pullman Standard boxcar. These kits are beautifully detailed and, in my humble opinion, excellent value for your money. InterMountain offer you an extra sprue of parts that allow you to build either an early car with a high brake wheel and roof walks, or a later car with chopped down ladders, a nice crossover platform and a brake wheel assembly with a shortened chain. I spent a few hours going over pictures of Penn Central 50ft boxcars on Railroad Pictures Archive and noticed that Penn Central had quite the varied collection of older 50ft boxcars. While the ladders were chopped down on some, many others retained their roof walks and high brake wheel mounts. I opted for the latter because I had a Plano photo etched 50ft boxcar roof walk and brake wheel platform I was dying to use. I assembled the car as per the kit instructions.
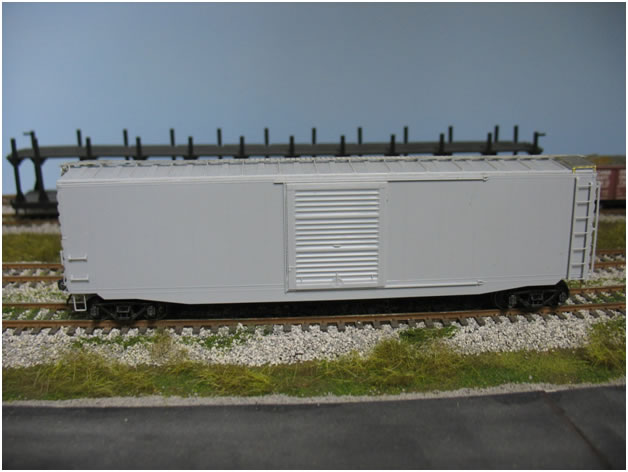
The one thing about these models is that they do not come with weights. I used peel and stick weights and weighted the car to four ounces. Once that was done, I glued the roof down and added the Plano running board and brake wheel platform. The kit supplied parts are nice, but the Plano photo etched ones add a really fine look to the car that compliments the crisp, clean molding of the model. The tricky part to this is the end supports to the roof walk and the frame that supports the corners. Plano provides a template for drilling the end support holes but the supports for the corners grabs seemed to be a bit high. I trimmed them down slightly until they followed the roof profile and then glued everything down. I used Microscale Krystal Kleer for this. I had read in Jeff Wilson’s excellent book Detailing Freight Cars that it was good for bonding photo etch to styrene and that it is! The added bonus is that it dries very clear and pretty well invisible.
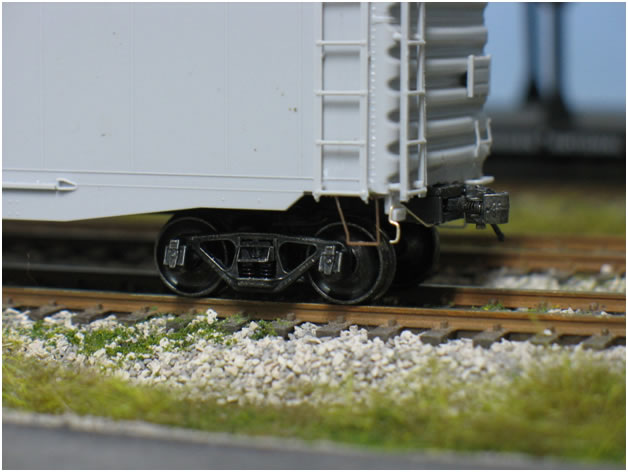
I decided to replace the kit supplied trucks with Kadee 70 ton ASF Ride Control trucks. To be honest with you, I had no idea that these trucks were so realistic in the way they are built so much like the prototype with operating springs! I was just happy to get a set of trucks with separate brake beam details. Well worth the seven dollars and change. I also added a Details West uncoupling lever and a set of Kadee 158 scale head whisker couplers. Like the trucks, the couplers are very nicely detailed and both compliment the InterMountain car nicely.
PAINTING
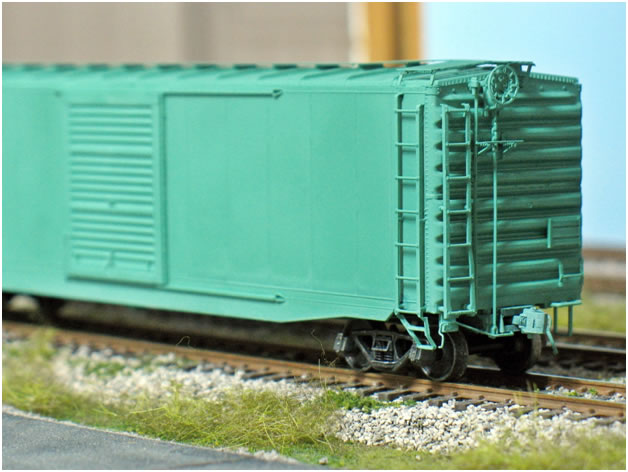
With the assembly done, I gave the car an airbrushing of Polly S Penn Central green. I was tempted to “stock up” on Polly S paints when I heard that Testors was, unfortunately, discontinuing their Railroad Colours paint line, but then decided against it. I suppose when this bottle is finished, I’ll have to find another brand. I have already bought some Modelflex Illinois Central Gulf Orange for an 86ft boxcar project which is next so we’ll see what happens. I usually tone down the base colour after I put the decals on. When the car had dried, I thought that the green seemed a little light and washed out. I went ahead and coated the car in Testors Model Master semi gloss clear and that deepened the colour just nicely so I opted to leave it as it was. With the clear coat dry, I could now move on to the decals.
DECALS
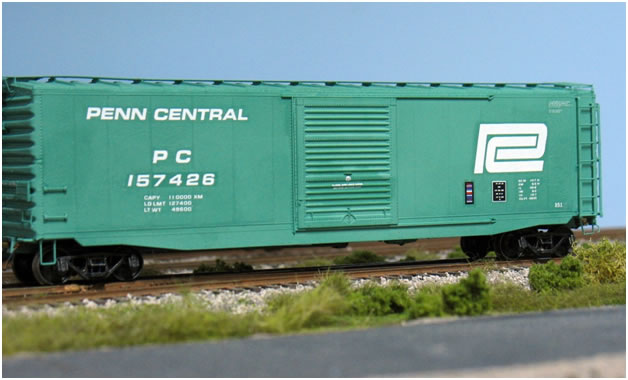
Initially, I purchased Microscale decal set 87-1094 Penn Central boxcars but realized it was the set with Pennsy style numbers. I ordered set 87-1096 Penn Central Boxcars with the PC style numbers as well as set 87-1097 Penn Central 86ft Hi-cube Boxcars (My next project along with an Illinois Central Gulf one). As usual for Microscale, they are excellent decals and with these three sets I have more than enough Penn Central decals for a ton of cars. I followed the prototype picture from Railroad Pictures Archive I was using as reference and had to do a bit of chopping to get the car number right. These older 50ft cars were numbered in the 15XXXX series and the sheet with the PC numbers is made for cars with a higher number series. Needless to say, it is a bit of a chore to set the numbers straight, properly space them, and prevent them from floating away on a sea of Micro Sol. Indeed there were some points where I felt like taking up my old smoking habit but managed to get them lined up and still remain a none smoker. I also added a Highball Graphics ACI tag. The stencilling in the top right corner was also, luckily, included with the 87-1094 set. Unable to resist the temptation, I put my magnifying glass on to see if they were actually legible. They are but actually read “If you can read this, the mind control drugs you are on are wearing off”. I’m pretty sure the prototype didn’t say that! As I had no clear picture of the car end stencilling, I went with the usual info on coupler spring type and 1W Steel Wheels. I was unsure about the roof colour so I watched the Penn Central video series I had bought from Green Frog Video and notices that the roof on most of these cars were painted green with the rest of the carbody but there were more than a few where the roof was left silver so you could go either way. I did use some Tamiya Matt Aluminum and stippled it along the edge of the roof panels slightly to give it a chipped look that exposed the galvanized panels underneath. I then drybrushed some silver on the high points of the roof where it would most likely have worn off quickly. Once done, I sealed the car once again but this time I used Microscale Matte. This flattened everything up nicely and provided a good base for the chalk pastels and pigments I use for weathering.
WEATHERING
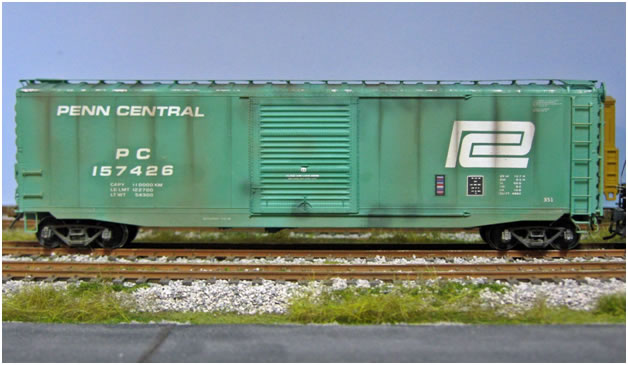
I began the weathering with a dirty black airbrushing along the door tracks and on the door latch. I also gave the underbody and the trucks a heavier dusting with the same colour. I switched colours next, to Testors Dark Skin Tone thinned down almost to a wash. I use this colour to spray on the bottom sills of the carbody and the ends to simulate road grime. I also use it to spray two thin lines on the ends for grime thrown up from the wheels. Lastly, I give the trucks a light overspray. This highlighted the detail and the very fine casting information on the ASF Ride Control trucks very nicely.
With the airbrush put away, I switched to pastels. I use Mungyo Earth Tone pastels which are perfect for any type of grimy, dirty and dusty weathering you could want. I started with the roof and dragged the grime down along the seams of the carbody. I tried to moderate the weathering to fit into my layouts timeframe of 1977-78, figuring this car at best, may have been painted in the early 70’s from its original New York Central colours to Penn Central livery. This is one of the reasons I avoided any heavy rusting.
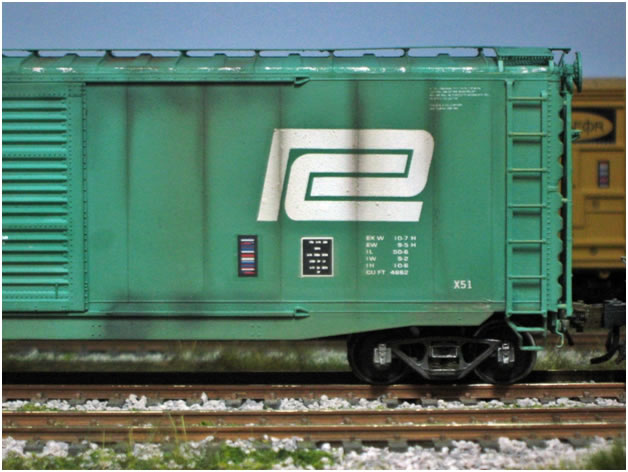
The last thing I did before finishing up was the wheels. Kadee wheels, like their trucks and couplers, are chemically blackened. Even the treads of the wheels are black. After I had painted the wheels, I used a Brite Boy to rub off the blackening. This leaves a nice, smooth, shiny tread. Once the wheels were replaced, I put it on my layout and ran it through the turnouts forwards and backwards to make sure everything was OK and did some switching. The couplers were a bit stubborn after painting but this was an easy fix by working them manually and dropping a bit of alcohol in the hinge to break up the paint. I found the Kadee trucks to be very smooth running. I have no doubt I will be picking up many more sets of these for future builds. Overall, a fun project! Now, it’s back to some scenery and ballasting track.

Modeling from the Prototype:
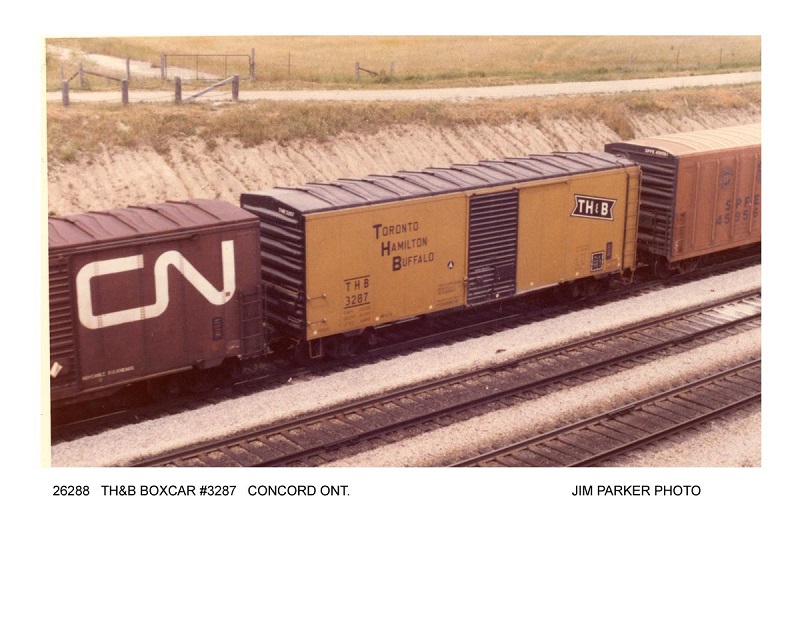
The yellow and black paint scheme was very attractive on the Toronto Hamilton and Buffalo 40-foot box car. Jim Parker clicked this early example in MacMillan Yard in the early-1970’s, wearing the green (EXPO ’67) Canadian Confederation Maple Leaf, and ACI labels.
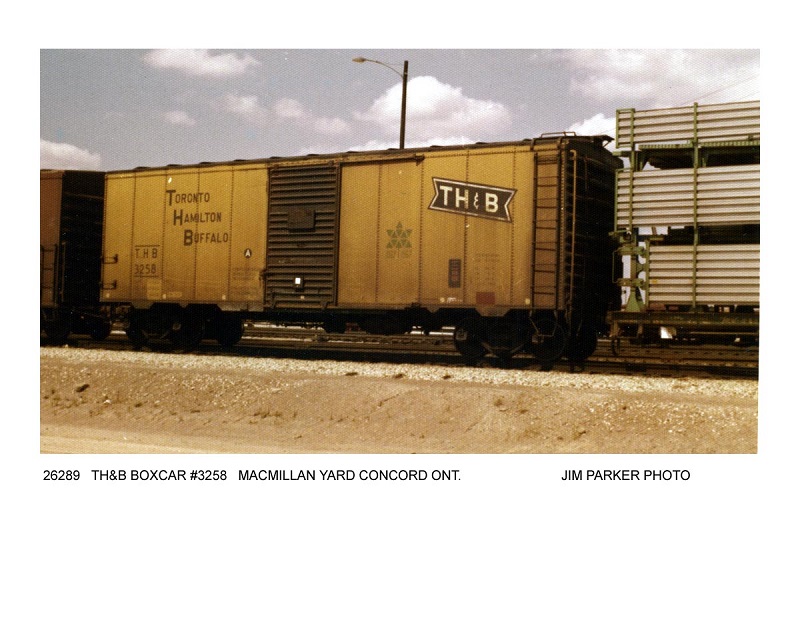
The late 1970’s version of the TH&B 40-foot cars, had the roofwalk removed, but the full length ladders remained with yellow warning labels on the sides, Jim snapped TH&B 3287 in fairly new paint arriving at Mac Yard . PHOTO
COMING SOON IN MODELER’S CORNER:
YOUR MODEL TRAIN CLUB BANNER HERE
NEED A NEW BANNER MADE
Train Clubs:
West Island Modular Railroad Club
http://wimrc.ca/
The Vermont and Essex Model Railway Club (Montreal, QC)
http://www.chemindeferve.com/
Sorel – Tracy Model Railroad Club
SOCIETY DE MODELLISM DE QUEBEC POSTER HERE
© CRO October 2013
